The dog grooming tools most home groomers need are a brush or comb matched to the coat, nail clippers or a grinder, dog-formulated shampoo, and blunt-tipped scissors. Clippers are optional and depend on the breed. Every tool also needs cleaning after use, and blades and scissors need sharpening or replacing over time.
Which dog grooming tools do you actually need in a starter kit?
A starter kit needs six things: a brush, a comb, nail clippers or a grinder, dog shampoo, towels, and a non-slip mat. Everything else can wait until you know what your dog’s coat demands.
Here is what each item does:
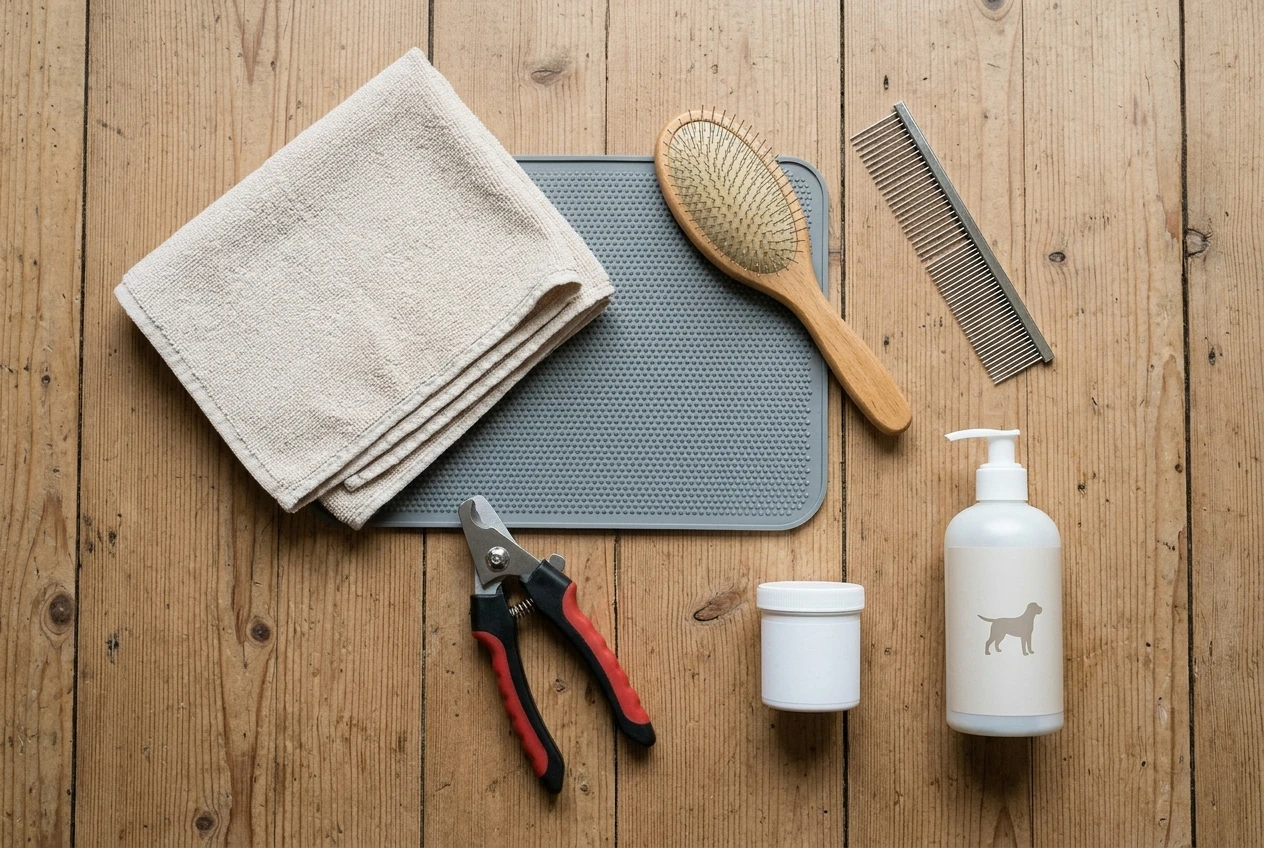
- Brush: removes loose hair and surface tangles. The right type depends on the coat (covered in the next section).
- Comb: checks that the brush reached the skin. A comb that snags shows you where tangles remain.
- Nail clippers or a grinder: keeps nails short enough that they do not touch the floor when your dog stands.
- Styptic powder: stops bleeding if you clip into the quick, the vein inside the nail.
- Dog shampoo: made for canine skin, which is different from human skin, so human shampoo is a poor substitute.
- Towels and a non-slip mat: a dog that slips on a wet tub floor will panic, and a panicking dog is hard to groom.
Add a dog toothbrush and dog toothpaste if you plan to brush teeth. Human toothpaste is not suitable, and some brands contain xylitol, which is toxic to dogs. An ear cleaner made for dogs and a few cotton balls complete the basic kit.
Skip clippers, thinning shears and dematting tools on your first shopping trip unless your dog’s breed clearly needs them. A short-coated Labrador-type dog may never need clippers. A poodle-type dog with a continuously growing coat almost certainly will.
How do you choose a dog grooming brush for your dog’s coat?
Choose the brush by coat type, because a brush that suits a smooth coat will skim over a double coat and a brush built for tangles will irritate thin, short hair.
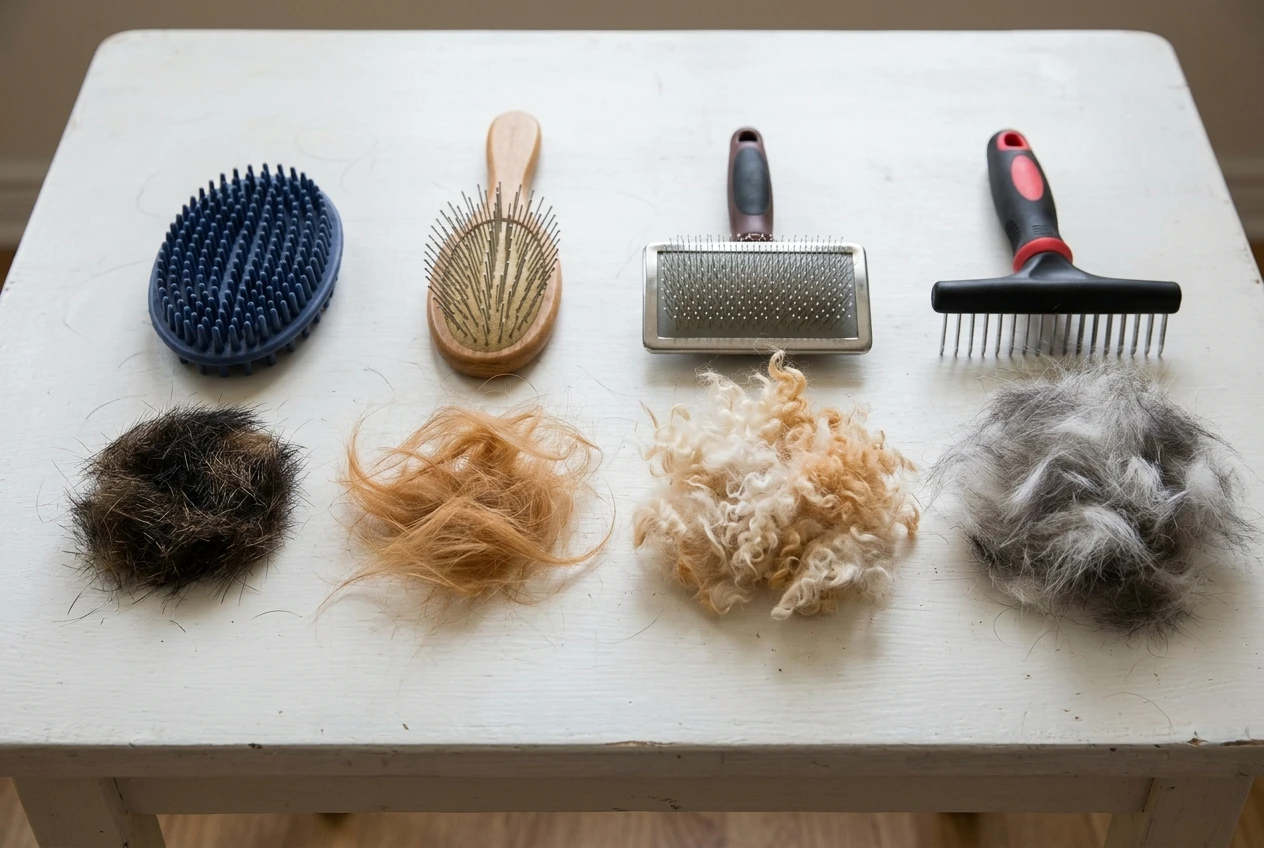
Coat type | Useful tool | What it does |
|---|---|---|
Short and smooth | Rubber curry brush or bristle brush | Lifts loose hair and spreads skin oils |
Medium to long, silky | Pin brush and a comb | Detangles gently without pulling the skin |
Curly or wavy, prone to tangles | Slicker brush and a comb | Works through the coat down to the skin |
Double coat (thick undercoat) | Undercoat rake | Pulls out dead undercoat that a regular brush misses |
Wiry | Slicker brush or a stripping tool | Removes dead hair; stripping technique varies by breed |
What to check before you buy a brush
Look at the pins on a slicker brush. Bent wire pins with small protective tips are gentler on skin than bare, sharp ends. The handle should let you hold the brush with a relaxed wrist, because you will use it for a long session on a large dog.
For the comb, many groomers like one with both wide and fine teeth on the same body. Use the wide end first and the fine end to finish.
A note on dematting tools
Mat splitters and dematting rakes have blades. They can cut skin, and a mat close to the skin is easy to pull tight without noticing. If a mat sits against the skin or the dog flinches when you touch it, take the dog to a groomer or vet instead of working it out yourself. Brushing regularly prevents most mats from forming in the first place.
Can you use human hair clippers on dogs?
You can technically, but human hair clippers are a poor choice for most dogs. They are designed for fine, thin hair and a short cutting session on a still person, so their motors tend to bog down in dense canine coats and overheat.
The blades are the other problem. Human clipper blades have teeth spaced for human hair, and they can pull or snag on dog hair. Pulling hurts, and a dog that hurts once will remember.
There is a narrow case where small trimmers help: tidying the area around the paw pads or the face on a calm dog with a light coat. Even then, pet-specific trimmers are quieter and better matched to the job. If you only need to shape a few small areas, trimmers made for pets are a sensible purchase. For a full-body clip, buy proper dog clippers.
What should you look for in dog clippers for home grooming?
Look for a motor strong enough for your dog’s coat, detachable blades in a range of lengths, low noise and vibration, and a design that does not get hot quickly. These features matter more than any brand name.
- Power and speed: thick or curly coats need a stronger motor. Two-speed models give you a slower setting for sensitive areas and a faster one for the body.
- Detachable blades: let you swap lengths and replace a dull blade without buying a new machine. Higher blade numbers cut shorter. Check the manufacturer’s chart before buying, since the numbering system is not identical across every brand.
- Guard combs (attachment combs): slide over the blade for a longer, more even cut. They suit beginners because they limit how close the blade gets to skin.
- Corded or cordless: corded clippers hold steady power through a long session. Cordless clippers move more freely around a wriggling dog, but battery life is limited and a fading battery weakens the motor mid-cut.
- Noise and vibration: a quieter machine is easier on an anxious dog. Read reviews from owners who groom dogs the same size and coat as yours.
- Heat: blades warm up as they run. Quality varies, so look for reviews that mention how long the machine runs before it needs a break.
Buy blades and guard combs that fit the model you choose. Replacement blades are a recurring cost, so check that they are easy to find before you commit.
How do you use dog grooming tools safely?
Use each tool on a clean, dry, brushed coat, work slowly, and stop at the first sign of pain or panic. Most grooming injuries come from rushing or from using a tool on a coat it was not designed for.
For clippers, this sequence keeps both of you safer:
- Bathe and fully dry the dog first. Dirt and damp hair dull blades and cause pulling.
- Brush and comb out every tangle before the clippers touch the coat.
- Turn the clippers on away from the dog and let your dog hear them from a distance.
- Clip in the direction the hair grows, using long, smooth strokes with the blade flat against the body.
- Pause every few minutes and touch the blade to the inside of your wrist. If it feels hot, switch it off, let it cool, or use a blade coolant made for clippers.
- Take extra care around skin folds, the armpits, the groin, the ears and the tail, where skin is loose and easy to nick.
For scissors, use blunt-tipped (rounded-tip) scissors around the face and paws. Keep your fingers or a comb between the blade and the skin, and never cut toward the dog’s eyes.
For nail clippers, take off a small amount at a time. On light nails you can see the pink quick through the nail. On dark nails, trim tiny slices and watch the cut surface: a dark dot at the center means you are near the quick. Keep styptic powder within reach before you start.
For the full step-by-step flow of a home grooming session, the guide linked at the end of this article covers the routine in order.
Why do dogs hate grooming tools, and what helps?
Dogs resist grooming tools because the tools are loud, vibrate, restrain them or hurt them, and a dog cannot know that the session is temporary. A single bad experience, such as a pulled tangle or a clipped quick, can make a dog wary of that tool for a long time.
Common causes include:
- Sound and vibration: clippers and grinders buzz close to the head and paws. Dogs hear a wider range of sound than people do, and some machines make noise beyond what we notice.
- Restraint: standing still on a table or in a tub is unnatural for many dogs, and being held feels like being trapped.
- Pain: dull blades pull, pins on a brush scratch, and mats tug on skin with every stroke.
- Touch sensitivity: paws, ears, tail and belly are sensitive areas on most dogs, and tools focus attention on exactly those places.
What helps is gradual introduction. Show the tool, let your dog sniff it, and give a treat. Then switch it on at a distance, treat again, and bring it closer over several days. Touch the tool to a shoulder or back, which is less sensitive, before moving to paws or face.
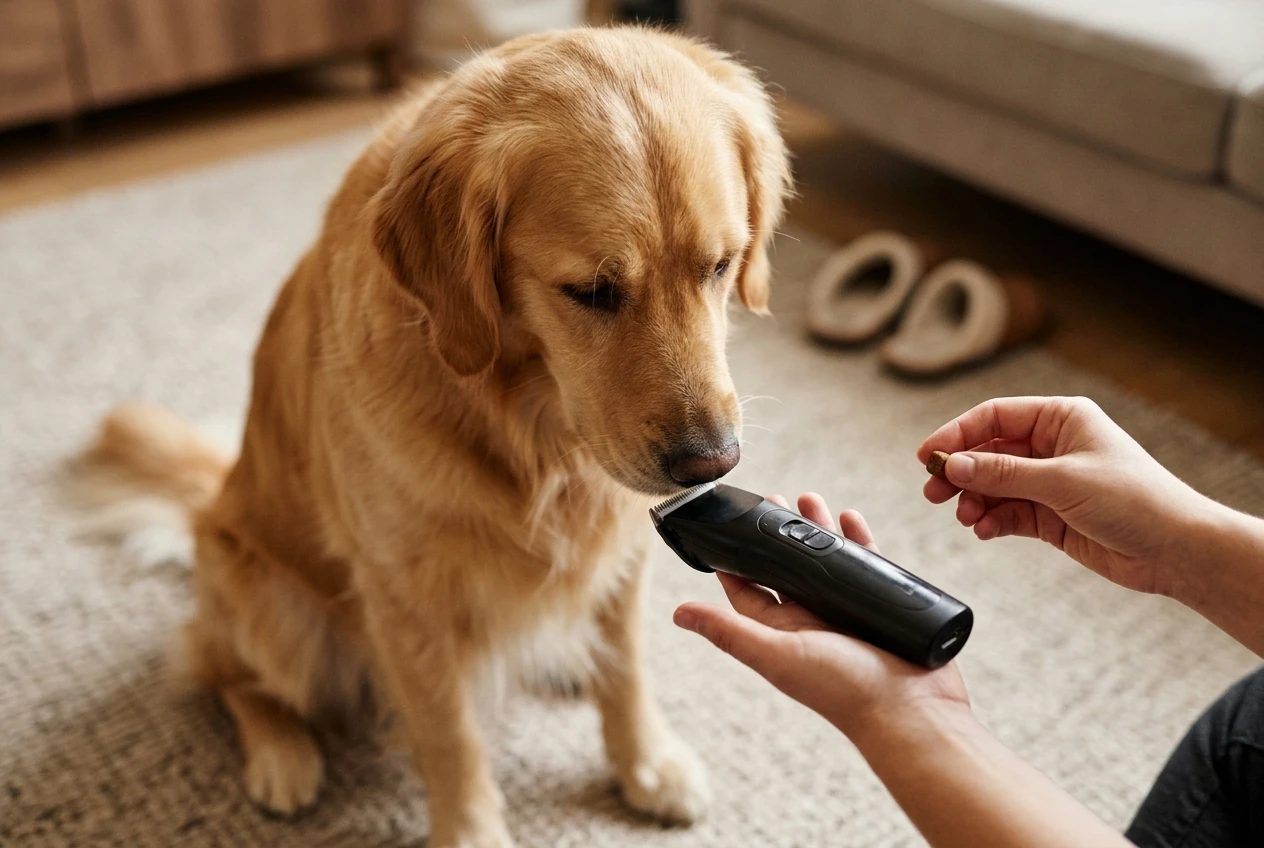
Keep early sessions very short, and end on something the dog finds easy. Use tools in good condition, because a sharp blade and a clean, unbent brush hurt less. If your dog shows growling, snapping, freezing or intense panic, stop and ask your vet or a professional trainer for help. Pushing through that kind of fear usually makes it worse.
How do you clean and sanitize dog grooming tools and clippers?
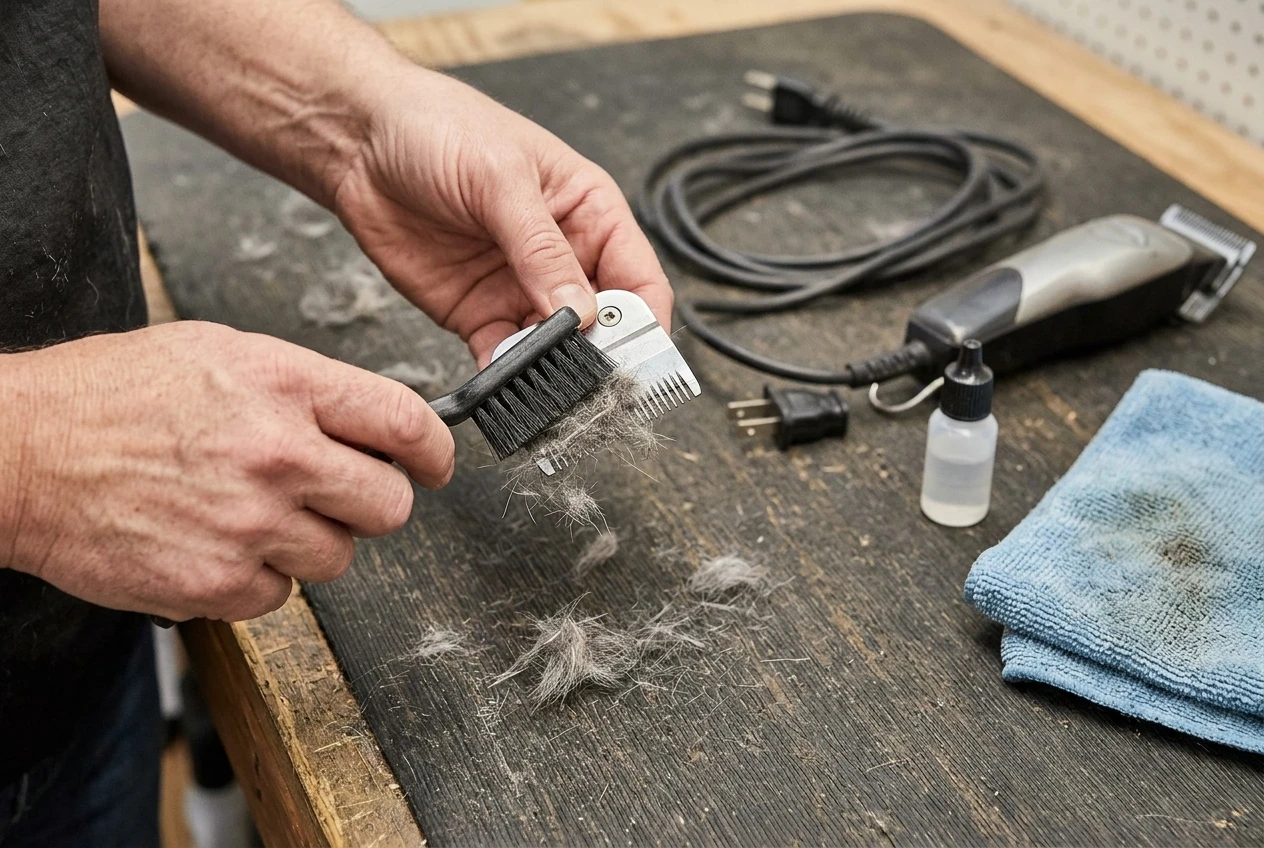
Clean tools after every use: remove hair, wipe off residue, sanitize the contact surfaces, and dry everything before storing it. Hair and skin oils left on a blade dull it and can carry bacteria from one session to the next.
Clippers and blades
- Switch the clippers off and unplug them or remove the battery.
- Brush the hair out of the blade and the vents with a small cleaning brush.
- Remove the blade if your model allows it, and clean beneath it.
- Apply a blade wash or a disinfectant spray made for clipper blades, following the product label for contact time.
- Wipe the blade dry.
- Add a drop or two of clipper oil along the blade teeth, run the clippers briefly to spread it, and wipe off the excess.
Never submerge clippers in water. Check your manual before using any liquid on the housing.
Brushes and combs
Pull the hair out of the brush after every session. Once a month, or sooner after a dirty dog, wash brushes and combs in warm water with mild soap. Let them dry completely, because trapped dampness can encourage rust on metal pins and mildew on wood or cushioned bases.
Nail clippers, scissors and grinder bits
Wipe nail clippers and scissors after each use, and sanitize them with a disinfectant wipe or spray labeled for grooming tools. Clean grinder bits of nail dust and replace them when they stop filing efficiently.
Sharing tools between dogs
If a dog has a skin infection, parasites or a condition your vet is treating, use separate tools for that dog and sanitize everything thoroughly after use. Ask your vet which products are safe for your situation.
How do you sharpen grooming scissors and how often should you replace clipper blades?
Send grooming scissors to a professional sharpener and replace or resharpen clipper blades when they start pulling or leave lines. How often depends on how much you use them, the coat type, and how well you clean and oil them, so there is no reliable calendar interval.
Scissors
Home sharpening kits can damage the edge geometry, especially on scissors with a convex edge. A professional sharpener who works on grooming shears can restore the edge correctly. Signs your scissors need attention:
- The blades fold or push hair instead of cutting it.
- You have to press harder than before.
- The blades leave ragged ends or skip sections.
- You can feel a nick or rough spot when you close them slowly.
Also check the pivot screw. Loose scissors chew hair, while over-tightened ones are stiff and wear faster. Clean and oil the pivot regularly.
Clipper blades
Blades dull from use and from hitting dirt, matted hair and debris. A dull blade pulls hair, runs hot sooner than it used to and leaves lines even after you have cleaned and oiled it. Those signs mean the blade needs resharpening or replacement.
Many detachable blades can be resharpened by a service that works on grooming blades, though each sharpening removes a little metal. Inexpensive blades may cost about the same to replace as to resharpen, so compare the two for the blade you own. A blade that is bent, chipped or missing teeth should be replaced, not sharpened.
Keep a spare blade in the length you use most. If one dulls partway through a session, you can finish gently instead of forcing a worn blade through the coat.
When your tools are chosen and in good shape, the next read is how to groom your dog or cat at home without stressing either of you, which walks through the session itself.